Saturday, 31 October 2015

Teaming up and moving onto the happy path

This is a story I think all developers know. A new team, starting a greenfield project under seemingly perfect conditions. An agile coach, an organisation ready for change and another team paving the way with a similar solution. And still, a few months down the line; a complex solution, broken deadlines and a feeling that things weren't moving in the right direction.

Not that things were going badly, they just didn't go as smooth as we hoped. And the team was very aware of what the problem was. We had inherited an architecture that we didn't feel comfortable with. Too much code was shared between applications and the complexity of the solution made us uncomfortable. We tried to solve our tasks the best way we could. But we did it alone, since the stress of missed deadlines kept us away from pair programming.

So. What to do to fix this situation before things went too far? We decided to change things around and break some patterns.

Shared responsibility

When the team started up, I got the inofficial title of architect. This is a title I don't like, for many reasons. The architect gets called to all the meetings, never have time to do anything else and sits on all the information that the team needs. A bit harsh, maybe, but this is my experience after having had this title the last 3-4 years. The way I see it, the more people who knows what we're supposed to build, the better. And with 6 experienced and informed developers in a team, the architecture will improve in every little corner of and around the solution.

So we discussed this in the team and came to an easy decision: we informed the organisation that our team no longer had an appointed architect. Meeting requests could be sent to the team as a whole and we promised that one or more of us would attend. Most of the times, at least two of us go to those meetings, one who knows the area and one who wants to learn. This has resulted in a situation where the team as a whole is informed of everything. Really, everything!

New project - new ideas

After the summer vacation, the team was supposed to start a new project and build a third website. The project kicked off with a hack week. During that week, we decided to sit together and get the foundation of the new site up and running. We wanted to simplify our solution and build something that we all felt comfortable with.

This turned out to be the real turnaround for us as a team. The result of that week was so good, so when the next week came, we decided to keep on sitting together. At first, we didn't really have a place to sit, so each day we found available conference rooms and booked them. We set a timer for 20 minutes and took turns at the keyboard. We as a development team made good progress, but we were practically invisible for the rest of the project team and organisation. So the next step was to make it official.

Mob programming

So one morning, we got an OK from our manager to use a couple of the tables in the middle of the office landscape. We put them together and installed a mob programming station. One big TV, a smaller screen and the dock for the laptop where the mob programming timer is displayed. A wireless mouse and keyboard together with all our mobile test devices completed the equipment. And there we've been ever since.

What is mobprogramming?

All the brilliant people working on the same thing,
at the same time,
in the same space,
and on the same computer.


Or in short, one driver at the keyboard and many navigators.

A normal day

  • Who's here today?
  • Dock one of our laptops at the mob station.
  • Set the timer on 12 minutes each, we use the handy Agility Timer.
  • Quick summary, where did we leave off yesterday?
  • Start coding!

And the navigators do what?

  • Real time code reviewing.
  • Googling.
  • Testing on mobile devices.
  • Looking at upcoming tasks so we're not missing strategic decisions.
  • Discussing design and architecture.
  • Making decisions together with the driver.

But how can that be efficient?!

It's not... If we're looking to maximize lines of code written. But we should all be beyond thinking that is a good thing by now, right? However, if we want to deliver working features with good quality and short lead times, this might be the way to go.

Short lead times?

Yes. If we have a working setup for continuous delivery, and everyone is working on the same feature, when we have no pull requests or merge issues, a feature can go from idea to production in the shortest possible time.

Good quality?

This section could go on forever. The positive effect we've seen in this area is huge. :)
  • The team is coding, reviewing, analyzing, designing and testing simultaneously.
  • We constantly learn together and from each other; technically, domain wise and valuable tips and tricks regarding tools and processes.
  • Knowledge sharing. Everyone does everything, from CSS to build scripts. If we don't know the area or feel comfortable, we lessen the time at the keyboard or just pass it over. But we still learn and become better developers.
  • The team considers more design options than a coder working alone would do. This typically results in less complex code.
  • The amount of unused, duplicated, unnecessary code is at a minimum. 
  • We now have an architecture that's alive, flexible and thought through on all levels of our solution.

What have we gained?

  • Focus! No context switching. We do one task at the time.
  • Continuity! We're not dependent on any one individual. No one has to work from home when they're ill to make a deadline.
  • Communication! With each other and others. Everyone is welcome to come over and talk to us at our table. It's easier for others, since they now only have one place to come to.
  • Fewer meetings! One or two of us goes to a meeting, the rest keep on working. The team still gets all the info when the meeting attendees get back.
  • No setup time for new team members! Productivity from day one.
  • No idle time! We never get stuck, we can always keep on moving.
  • Teambuilding 101! Coding together 9 - 5 builds a team in a way no AW can do...
  • More fun! Which means more motivating. Which means we're more productive.

How can we make it work?

Some basic things are needed in this process. They might not be there from the beginning, but to be successful I think you need to get there.
  • Trust. Within the team and from the organisation.
  • A shared objective. Agree on what you want to achieve by working this way.
  • Respect for the competence and experiences of your team mates.
  • Humility. We all know it, right? "There's no I in team". ;)

Do I miss coding alone?

No. And I don't want to go back to that. When I code at home, I code alone. But I never do work stuff at home anymore, just coding for fun.

Changed team - changed organisation

This is actually the amazing part of our team's transition. The organisation changes with us. The project we are setting out to do next was originally set up as a traditional IT-project. Now we're changing it so the whole team, including business analysis, design and UX will work much more closely.

Instead of being 2 months ahead of development, we'll all be working on the same feature. The ideas from last week will be put in production next week. We'll eliminate waste and go directly to what we do best, code it, test it, tweak it. It's going to be a very interesting journey. :)

Saturday, 31 January 2015

Viewing local site from other computers on the network

This easy solution is turning out to be a huge convenience for me. I run Windows as a VM on my Mac using Parallels Desktop. I want the Windows installation to be as clean as possible, not having to install a lot of browsers to be able to check my code and so forth. 

The Mac OS is where I normally do things, I keep all my non .Net code there and all the developer utility tools I need. So to use the browsers on my Mac side to view what I'm working on in my Windows VS dev environment, this is what I do.

I just use the built in IIS Express while working. This means my settings for the web project in VS looks like this. A random portnumber is given for the localhost. To find this info, right click your web project and choose 'Properties'.


This results in a nice webpage showing up at http://localhost:2686 when i start and run the site.


It also results in the following configuration being made in the applicationHost.config file for IISExpress. This is the part describing which website can be reached on which address. The applicationHost.config is cleverly hidden, usually at {youruseraccount}/Documents\IISExpress\config. You need to open it as an administrator to be able to save your changes. 


Under the <sites>-node you find all the sites currently configured for your IISExpress. The interesting part right now is the binding configuration. This one tells you the site can be found at localhost:2686. That seems about right. But the Mac host, or any other computer on your network can't call localhost:2686 to see the site, they'd just be ending up on their own localhost of course. So this is what we need to fix.

The pattern for the binding is <ipnumber>:<port>:<localhost>. I want to keep the current localhost:2686, that's nice. But I want to add a new binding making sure I can view the site from my Mac. And since I'm calling the windows localhost with win.localhost in other contexts, I add the following line.


Now, to be sure Visual Studio can use this binding, it has to be run in administrator mode. Just start the site up and go to your other machine...


And look at that! Just as beautiful on a Mac. Now... A few things need to be said. The reason I can write win.localhost:2686 on my Mac is because I have that IP-number mapped in my hostfile, like this:

10.211.55.3 win.localhost

And, another reason is that I have opened the Firewall in my VM for incoming calls from the Mac. So those things need to be fixed as well.

If you want to access the localhost from the outside via the IP-number, all you have to do is change the binding in applicationHost.config to the IP-number of your computer on the internal network. Like this, in my case:


Monday, 5 January 2015

Step one - A simple Elastic Search Repository using NEST

So, I now have Elastic Search set up on my Mac and decided to build an API using .Net and Nancy that will serve as an inventory service for the cars in my Car Rental-solution. I've made sure I can call the Elastic Search instance using the address mac.localhost:9200. 

The first thing I want to do is to create a kind of repository wrapping Elastic Search, and tests to make sure everything works. But since I really wanna do my solutions teeny tiny, I don't want to do that in a separate project but in the Nancy App itself. Which makes the first step creating the Nancy App that will hold the API.

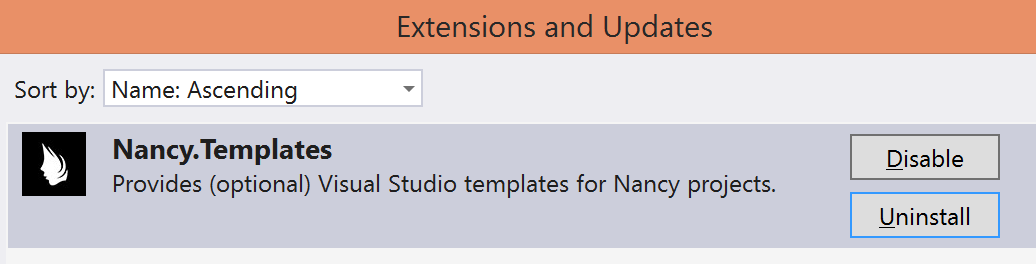
Nowadays, Nancy comes with some nice project templates for Visual Studio. Just go into Tools >> Extensions and updates to download them.


And now you find them together with all the normal Project templates:


I'm trying hard to do things as simple as possible to start with, which for instance means I try to avoid interfaces unless I see the clear need, meaning either several implementations of a common contract or the need to mock a dependency for unit testing. Here, I see the need to do the latter so I start with a simple ICarRepository interface:

public interface ICarRepository
{
  string Save(Entities.Car car);
        Entities.Car Get(Guid id);
        bool Delete(Guid id);
        IEnumerable<Entities.Car> List();
        IEnumerable<Entities.Car> Search(string query);
}
And as you see, not a trace of generics. Cause this is a small API serving only cars. :)
Now, next step is to implement this contract in an ElasticSearchCarRepository. And to do that, I need an Elastic Search client for .Net.


NEST

The client I've chosen to use is NEST, which seems to have all the basic functionality I could possible want for a simple application. It's one of the two official ES clients, the other being the more low level Elasticsearch.net, which NEST actually uses internally. NEST has a nice strongly typed Query DSL which makes queries against Elastic Search quite easy. To use NEST, just install the Nuget package.
All that is needed to start indexing and querying Elastic Search with NEST is to create an ElasticClient and start using it as the simple examples below show. The "cars"-string is the name of the index targeted by the client.

elasticClient = new ElasticClient(new ConnectionSettings(
 new Uri("http://mac.localhost:9200"), "cars"));
elasticClient.Index<Entities.Car>(car);
elasticClient.Search<Entities.Car>(s => s.QueryString(query))

Since the client is threadsafe I choose to inject it into the repository. Doing that lets me change the client for the tests I'll write so I can test the repository using a testindex that I can play with any way I want to without worrying about destroying real data.

The ElasticSearchCarRepository

The first version of the repository ends up looking like this.

public class ElasticSearchCarRepository : ICarRepository
{
    private readonly ElasticClient _elasticClient;
 
    public ElasticSearchCarRepository(ElasticClient elasticClient)
    {
        _elasticClient = elasticClient;
    }
 
    public string Save(Entities.Car car)
    {
        var result = _elasticClient.Index(car);
        return result.Id;
    }
 
    public Entities.Car Get(Guid id)
    {
        var result = _elasticClient.Get<Entities.Car>(id.ToString());
        return result.Source;
    }
 
    public bool Delete(Guid id)
    {
        var result = _elasticClient.Delete<Entities.Car>(id.ToString(),
            x => x.Type("car"));
        return result.Found;
    }
 
    public IEnumerable<Entities.Car> List()
    {
        var result = _elasticClient.Search<Entities.Car>(search => 
            search.MatchAll());
 
        return result.Documents;
    }
 
    public IEnumerable<Entities.Car> Search(string query)
    {
        var result = _elasticClient.Search<Entities.Car>(search => 
            search.QueryString(query));
 
        return result.Documents;
    }
} 

The only thing really interesting here is the id. Elastic Search creates it's own string id if you don't provide it with a specific id when indexing documents. My car entity already has a Guid id that I want to use. This is possible with a simple mapping in the entity class:

[ElasticType(IdProperty = "CarId")]
public class Car
{
 
    [ElasticProperty(Index = FieldIndexOption.NotAnalyzed)]
    public Guid CarId { getset; }
    public string Make { getset; }
    public CarType CarType { getset; }
    public int DoorCount { getset; }
    public int BagCount { getset; }
    public bool HasAirCondition { getset; }
    public TransmissionType TransmissionType { getset; }
    public decimal RentalPricePerDay { getset; }
    public string Currency { getset; }
 
}

The IdProperty on the class tells Elastic Search which property to use as id. And since this is a Guid, we want to make sure ES does not analyze the field, in which case it would split the guid into several strings using the dash as a delimiter.

Another thing worth mentioning here is that I use two enums. NEST sends these values to ES as the integer values. It works well and the enum gets nicely set again when serializing documents, but I'd rather have the string value in ES for those cases when I just wanna look at the data directly. To do this, I have to set the proper converter when creating the client, like so:

public static ElasticClient CreateElasticClient()
{
    var uri = new Uri(ConfigurationManager.ConnectionStrings
        ["ElasticSearch"].ConnectionString);
    var settings = new ConnectionSettings(uri, "cars");
    settings.AddContractJsonConverters(type => 
        typeof(Enum).IsAssignableFrom(type)
            ? new StringEnumConverter()
            : null);
    return new ElasticClient(settings);
}

Testing the repository

To test the repository out I create a simple class library project and import xUnit.Net as a Nuget. There are some different options on running xUnit-tests. I use Resharper, where the option is available as an extension. Other runners are available via Nuget.

xUnit has a nice and easy way to share context between methods, meaning setup and teardown methods. By creating a fixture-class that inherits from IDisposable, you can put your setup in the constructor and your teardown in the Dispose-method. What I do here is that I create the repository in the fixture-class, using a client targeting a "cars_test"-index. In the Dispose-method, I just delete that index. It's only there for testing so it's ok.

public class ElasticSearchFixtureIDisposable
{
 
    private readonly ElasticSearchCarRepository _repository;
    private readonly ElasticClient _elasticClient;
    private const string IndexName = "cars_test";
 
    public ElasticSearchCarRepository Repository
    {
        get { return _repository;}
    }
 
    public ElasticSearchFixture()
    {
        _elasticClient = CreateElasticClient();
        CreateTestIndex();
        _repository = new ElasticSearchCarRepository(_elasticClient);
    }
 
    private ElasticClient CreateElasticClient()
    {
        var uri = new Uri(ConfigurationManager.ConnectionStrings
            ["ElasticSearch"].ConnectionString);
        var settings = new ConnectionSettings(uri, IndexName);
        settings.AddContractJsonConverters(type => 
            typeof(Enum).IsAssignableFrom(type)
                ? new StringEnumConverter()
                : null);
        return new ElasticClient(settings);
    }
 
    private void CreateTestIndex()
    {
        DeleteIndex();
        _elasticClient.CreateIndex(IndexName, x => x
            .NumberOfReplicas(1)
            .NumberOfShards(1));
    }
 
    
    public void Dispose()
    {
        DeleteIndex();
    }
 
    private void DeleteIndex()
    {
        _elasticClient.DeleteIndex(IndexName);
    }
}

With the fixture in place, I create my test class and can now test if my favourite car can be saved. The fixture class gives me access to the repository and takes care of cleaning up the test data afterwards.

public class ElasticSearchCarRepositoryTests : 
    IClassFixture<ElasticSearchFixture>
{
 
    private readonly ElasticSearchFixture _fixture;
 
    public ElasticSearchCarRepositoryTests(ElasticSearchFixture fixture)
    {
        _fixture = fixture;
    }
 
    [Fact]
    public void Save_Should_Return_Id_Of_Indexed_Car()
    {
        // given
        var carId = Guid.NewGuid();
        var car = CarBuilder.CreateCar()
            .WithId(carId)
            .WithMake("Ford Focus")
            .WithCarType(CarType.Premium).Build();
 
        // when 
        var result = _fixture.Repository.Save(car);
 
        // then
        result.Should().Be(carId.ToString());
    }
}

Very easy first step. With loads of stuff missing. Error handling, logging will come later. But next step is to get the Nancy API up and running with tests. And make everything async.

Code, in one state or another, can be found at github.com: https://github.com/asalilje/CarAPI :)

Thursday, 1 January 2015

Now where is that localhost..?

Running Parallels desktop on my MacBook, I figured I wanted to add as little as possible to my Windows installation. Just the necessary things to be able to do .Net development. Visual Studio and SQL Server. As to other databases, I should be able to use the instances already installed on my Mac.

So how to call the localhost of the other OS? Well, not too hard really. Since they're both on a shared network, I should just be able to use the IP-adresses. So first, we need to find them.


Finding the IP-address for the Mac host and using it on Windows

Go into the Parallels Desktop menu >> Preferences. Click the tab Advanced and then Network: Change settings. Check the box 'Show in System Preferences'.


Now you can go into the Apple menu >> System preferences >> Network and find the IP-address of the host under the Parallels network provider.


To check if this works, I started up a node server on my Mac, on localhost:4000.


I went in to my Windowsinstallation and tried to call it with the IP-number 10.211.55.2.


Great success! But of course, I don't want to remember that IP-number. So let's edit the hosts-file. And as always, when editing system files, don't forget to run notepad or whatnot as an administrator. The hosts-file, if you managed to avoid it this far, is located in C:\Windows\System32\drivers\etc.

Add the following line to the file: 
10.211.55.2     mac.localhost

Save it and you should now be able to call the service with mac.localhost instead. Yay!


Finding the IP-address for the Windows guest and using it on Mac

As you probably guess, you do the same thing. To get the IP-number for the Windows guest, go into Windows, start a Command window and type ipconfig. Look for the IPv4 Address.


Now go back to the Mac and find the hosts-file under /etc. Add the following line to the file:
10.211.55.3 win.localhost

And now you should be able to call the windows localhost from Mac using win.localhost.

ElasticSearch issue

After running Elastic Search on my Mac I wanted to use that instance for my Nancy API I was building on Windows. Since Elastic Search was running on localhost:9200 on the Mac, I assumed the above solution would work without problems. But nope, I just got a Website not found response when I tried to access mac.localhost:9200 in the browser. 

Since everything worked with my node server it seemed there wasn't an issue about firewalls or security. I tried some CORS-configuration for a while, thinking that might be the problem. It definitely seemed to have something to do with the Elastic Search configuration and setup. 

After quite a long while I found the thing. The Elastic Search config file elasticsearch.yml had the entry network.host: 127.0.0.1. Apparently this entry didn't care about the parallel network adapter at all. So I simply changed the entry to use that IP instead: 10.211.55.2 and restarted Elastic Search.

But wait! Now it works perfectly calling mac.localhost from Windows but I can't call localhost:9200 from the Mac! So another trip into both of the hosts files.

Now I have this in Windows:
10.211.55.3     win.localhost
10.211.55.2     mac.localhost

And this in Mac:
10.211.55.2 mac.localhost
10.211.55.3 win.localhost

All is well and I can develop my .Net-stuff and call services on the Mac. Very neat. I haven't tried the other way around yet, that might be a blogpost for another day.

Tuesday, 30 December 2014

Command Window tricks

You know when you misspell something in the Command window and have to go all the way back and fix it? Try this instead:

F1: will copy the previous command char by char.
F2: will copy the previous command up to the char you want.
F3: will copy the previous command from the char you are at and to the end.

So, for instance: I wanna run my tests in the console and happen to pick the wrong version of the testrunner, 1.9.2.

>..\src\packages\xunit.runners.1.9.2\tools\xunit.console.exe Car.API.Tests.dll

To change it, I just press F2, copy to the char '2', edit the command with a '3' instead and press F3 to complete the command.

Another gem is the F7-button that will give you the history of commands if you don't wanna page through them with the arrow buttons.

And a very useful one, pipe output to the clipboard. As easy as adding | clip after a command.

>..\xunit.runners.1.9.2\tools\xunit.console.exe Car.API.Tests.dll | clip

Monday, 29 December 2014

Time to get a new test project going

I used to have a big solution on one of my PCs at home, containing all the new and exciting stuff I wanted to try out. Opened it up the other week to see if I could make it even bigger but woah, it was infected all over with WCF, Silverlight and good old Comet.

No fun. So this is my new holiday project: A new solution to try out fun stuff. And for sentimental reasons and certain domain knowledge, I'll make it a Car rental solution. :)

  • I need to work more with Elastic Search, so I'll use that as a repository for one or more of the services. Not because it's a brilliant secure datastore, but to test it out.
  • I think I should try out Raven DB as well, it's been a couple of years and I've forgotten all about it. 
  • I want to get better at thinking DDD style so I'll use it to set up the micro services I want to implement. I'll just use HTTP-requests to call them to begin with, and that will probably make me realise there are some major issues surrounding that and I'll have to solve them. And better here than in a real project at a customer's, right? :)
  • I want to use async more, so that will be implemented throughout the system.
  • I'm gonna build two clients, one for administering the cars and one for customers renting them. These will probably be built in MVC5, at least one of them, since that is what I'll be working with professionally the coming year.
  • I'm gonna try out different ways of logging and getting metrics. This is such a left behind area in developing web solutions and I'm no better. I suck at it, but I do see the huge values.
  • I'll try out different ways of deploying. Asimov deploy is on the list. And I wanna look into Docker.
  • Since I'm going micro services, I'll do at least one of them in Node.js. 

I think that's it to begin with... And my intention is to blog about it. If I don't, you know I got stuck in front of Walking Dead again.

Wednesday, 17 December 2014

Debugging an app on a remote server in your own Visual Studio

I've been there many times. Something is not working on the dev or test environment, logging is below par and I wish I could just debug the application as I do during development on my own machine. And it's actually not very hard to do exactly that.

Prerequisites: The build has to be done with a debug configuration. A release configuration will optimize the pdb-files and you won't be able to follow the state of the code when debugging. In my case, the command that triggers the build script in Jenkins accepts a parameter for which configuration to use. This sets the configuration switch for MS Build to the desired configuration, like so: /p:Configuration={wantedconfiguration}.

So in steps, to get up and running with remote debugging:

1. Log in to the remote server where your app is running.

2. Download the correct version of Microsoft's Remote Debugger Tool from here.

3. Install it on the server. To do this, you have to have admin rights on the server since the installer makes the changes needed in the firewall to open the port used by the tool.

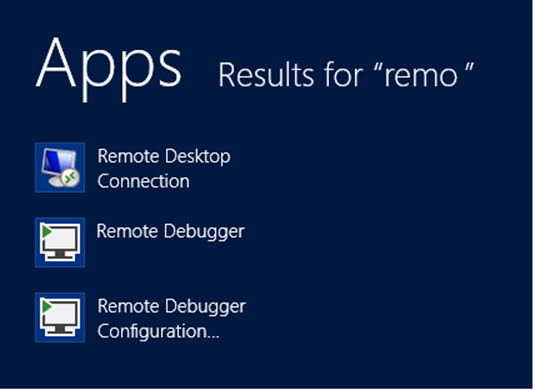
4. When the install is done, you'll find two new apps on the server, the Remote Debugger and Remote Debugger Configuration. The Configuration can be changed to run the debugger as a service or to change the settings in the firewall. Usually, the default configuration works just fine.


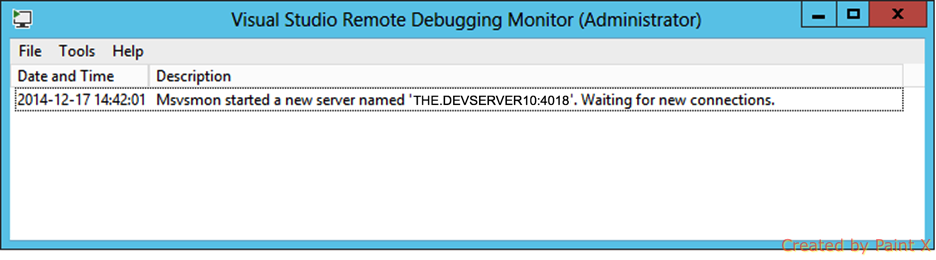
5. Start the Remote Debugger. And, this is important, you have to run it as an administrator. You'll see which URL the debugger is listening at. Copy that URL. You can change settings here too, if you want to allow anonymous access or whatnot, but default settings works fine here as well.


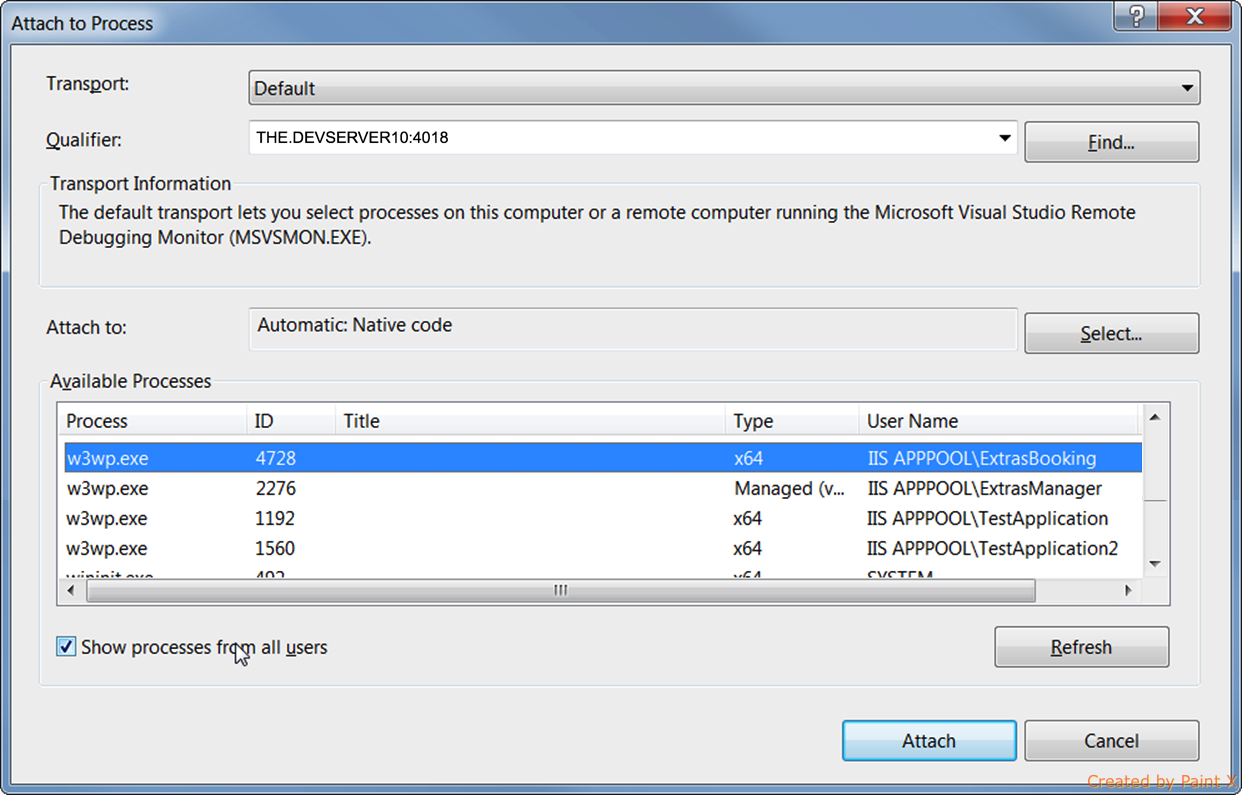
6. Go back to your own local desktop and open the solution you want to debug. In the menu, choose Debug >> Attach to process. In the Qualifier field, paste the URL you copied from the Remote Debugger. This should bring up a list of the processes currently running on that server. Make sure the checkbox 'Show processes for all users' is ticked. Find the process you want to debug and click 'Attach'. IIS sites are running as w3wp.exe processes with the app pool name showing under 'User name'.


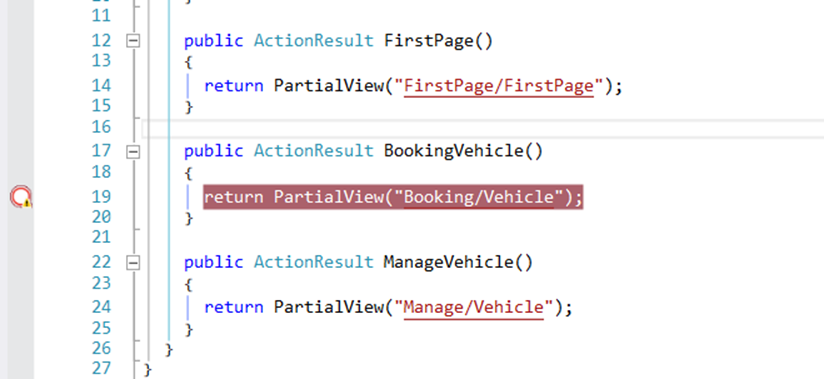
7. Now you can set a breakpoint in your code, but you see that it's not active. Mousing over it shows 'No symbols could be loaded'. What is needed are the symbol files, or the pdb files from the remote server. They have to be available locally on the same machine as Visual Studio.


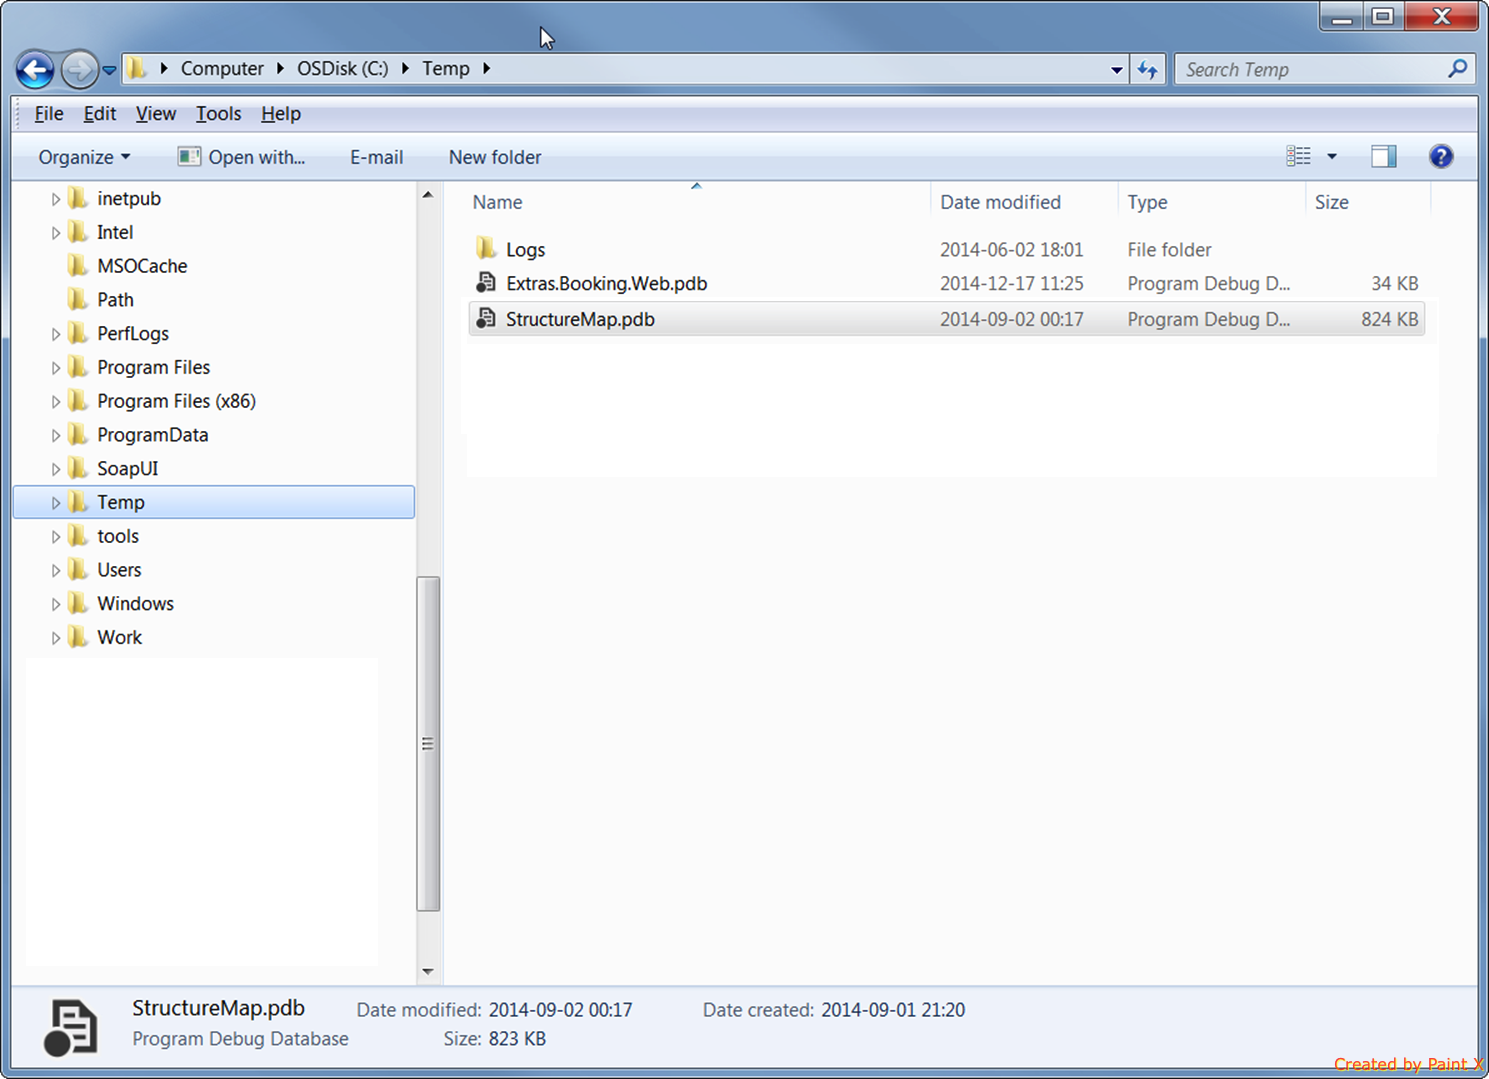
8. We could make this easy or hard, I'm choosing the easy route. Copy the pdb-files from the remote server into a folder on your machine, for example C:\Temp. :)


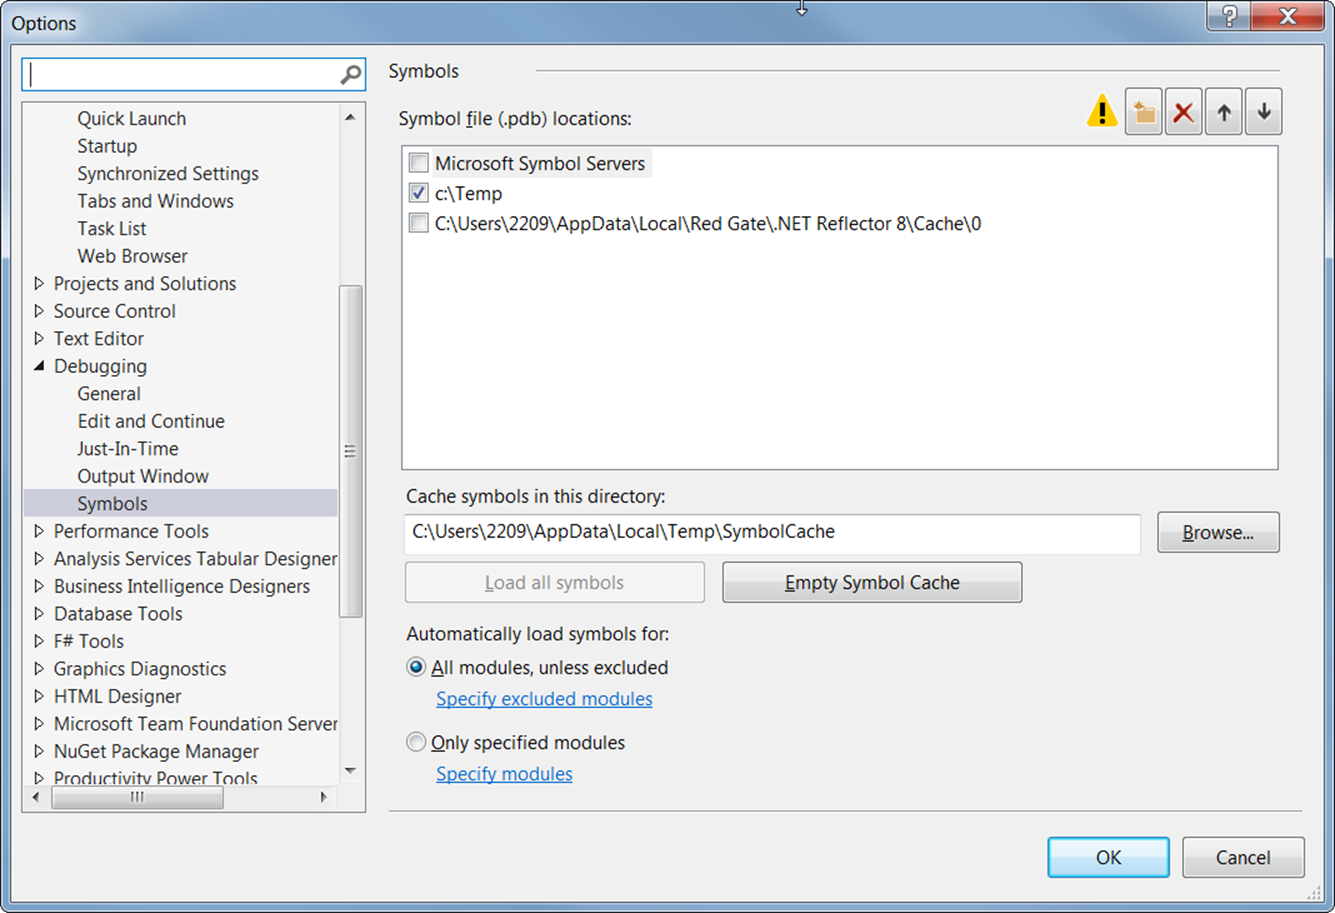
9. Now we have to tell Visual Studio where to look for symbol files. This is done in the almighty Tools >> Options. Click Debugging >> Symbols. Under Symbol File Locations, add the location where you copied the pdb-files, in my case C:\Temp.


10. Reattach to the process, surf onto your erring web or api on the remote server and this time it should work. Breakpoints should be hit, state of variables should be shown. And life is good once again!

Troubleshooting

  • Do you have the correct version of the pdb-file? It has to be exactly the same version that is currently running on your remote server. One CI-build later and it's not working.
  • Of course, if you install the Remote Debugger on one machine, make sure you're really surfing to that specific machine directly and not through a load balancer.
  • If the breakpoint is caught but no state is shown due to "optimizing", it means the build was done with the Release configuration.
  • Sometimes you'll get an error message saying "Invalid memory allocation" for a process that's already attached or that you're trying to reattach. It's Visual Studio playing up. Restart it and it will probably work again.

Alternate solution

If you don't want to install the Remote Debugger Tools on your remote server, you can install it on a fileshare and access it from the remote server.